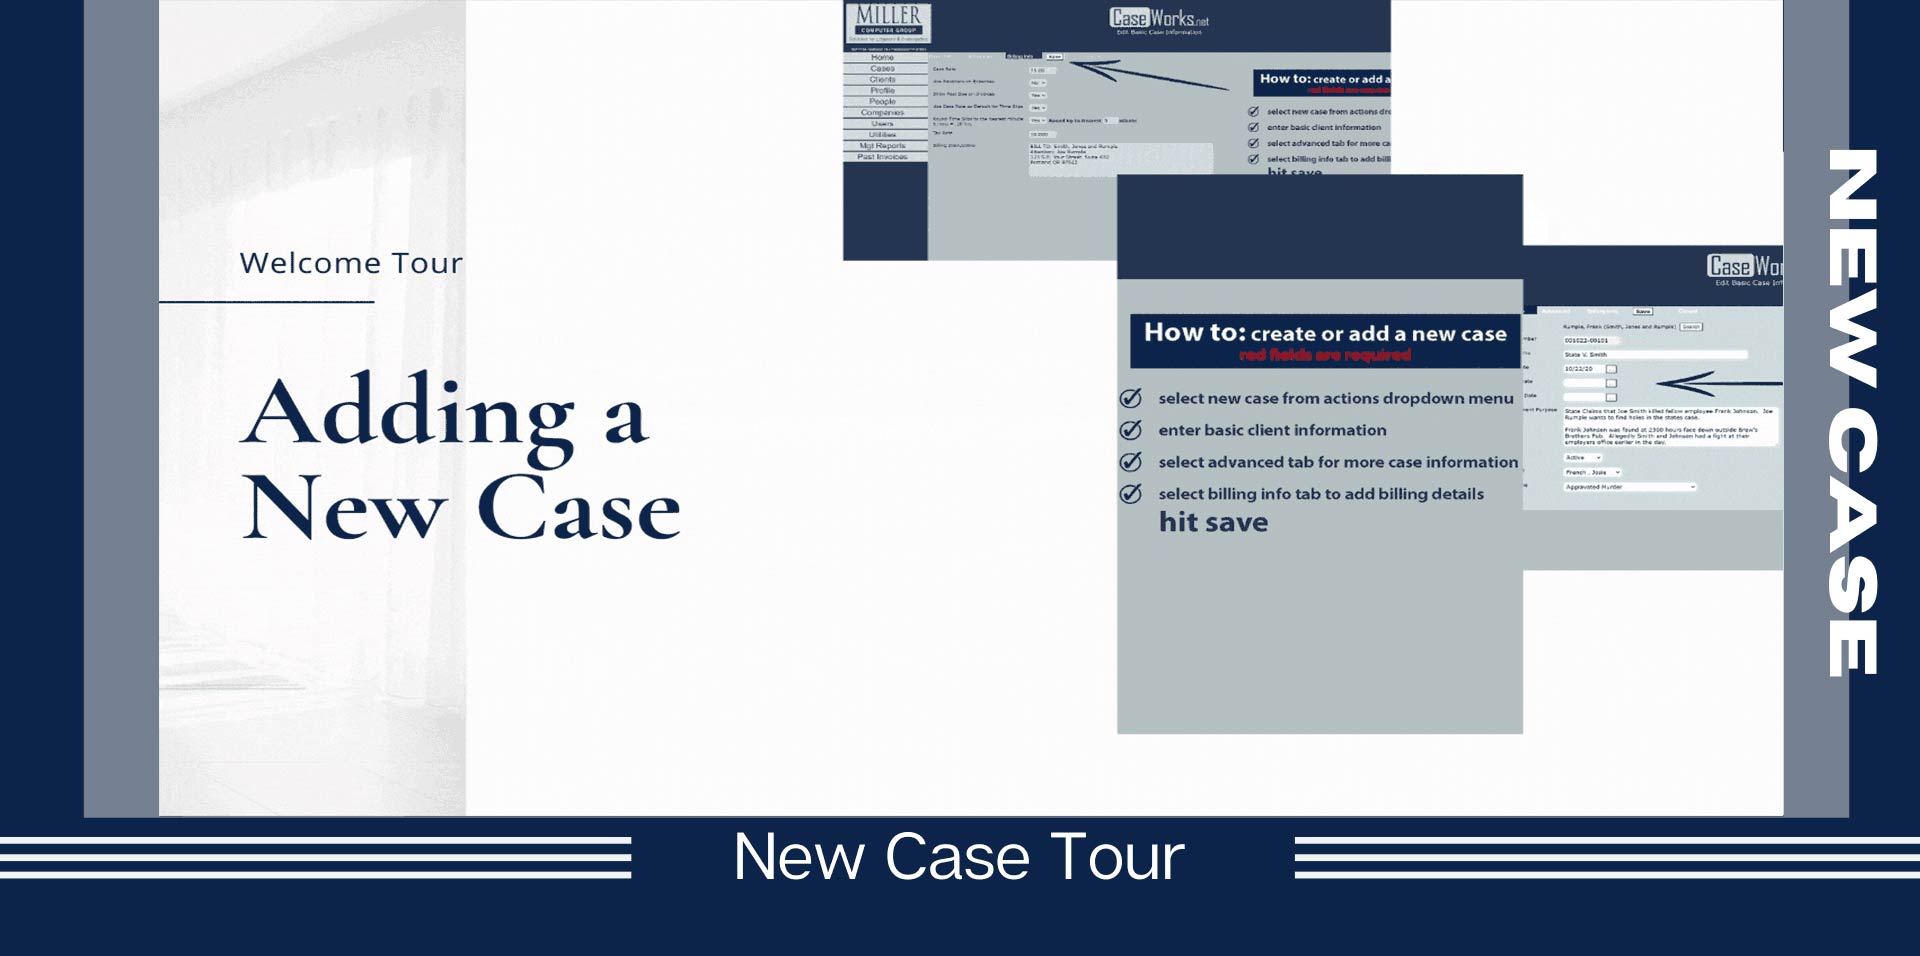

There are many different ways to add a new case in CaseWorks but today I’m going to show you the fastest way to create a new case from your home screen.
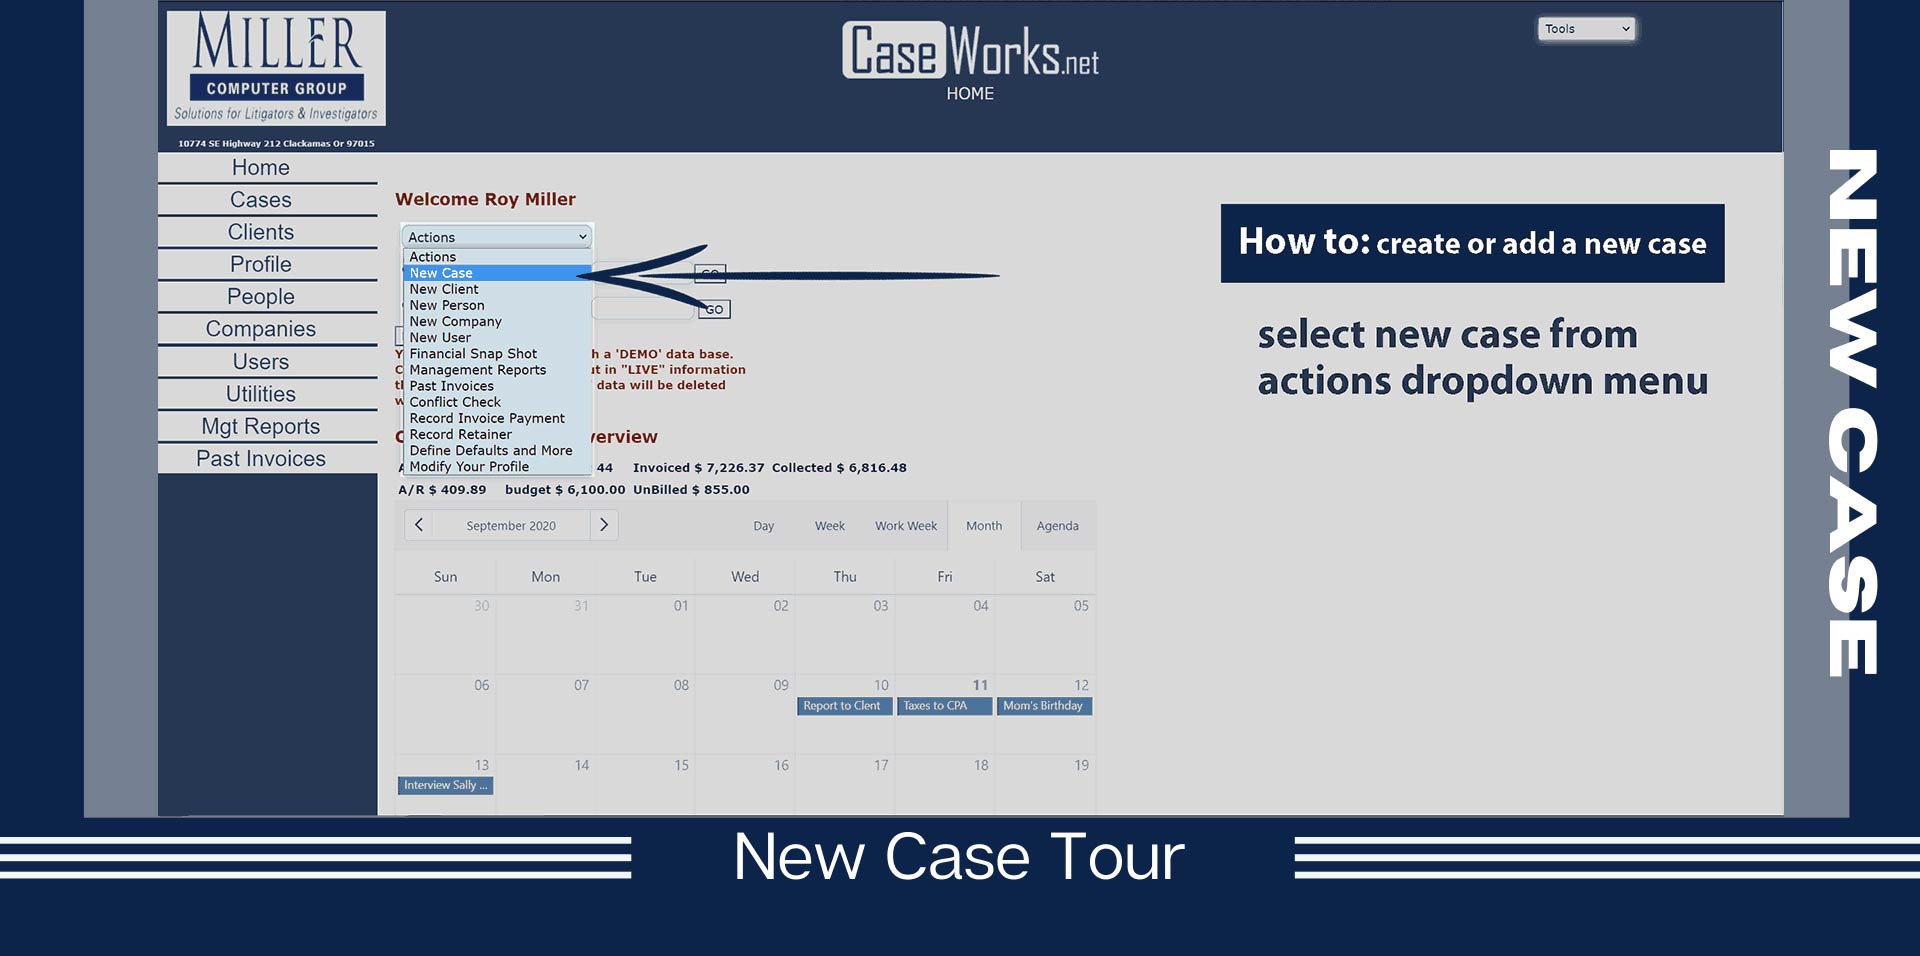
While looking at your caseworks home screen you will find an action dropdown menu on your left-hand side, from the action dropdown menu select new case.
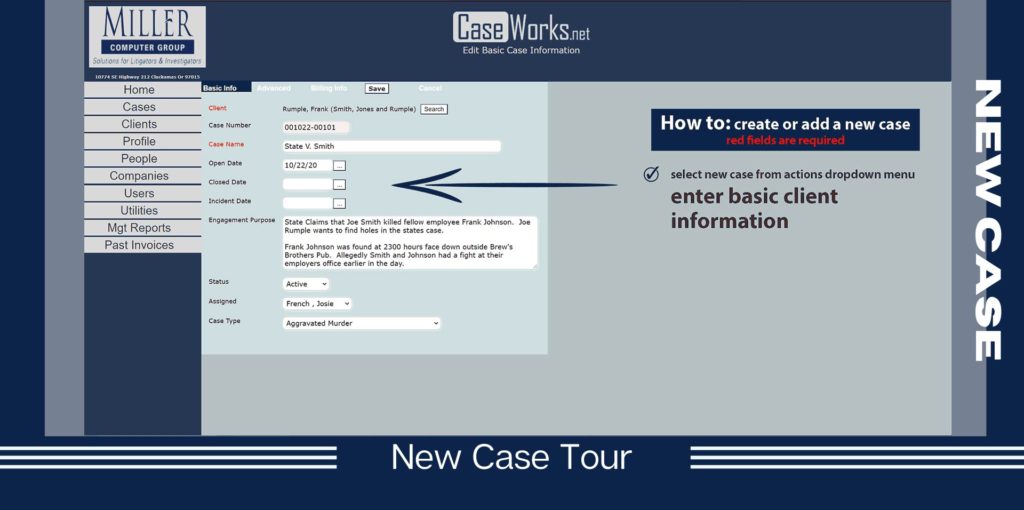
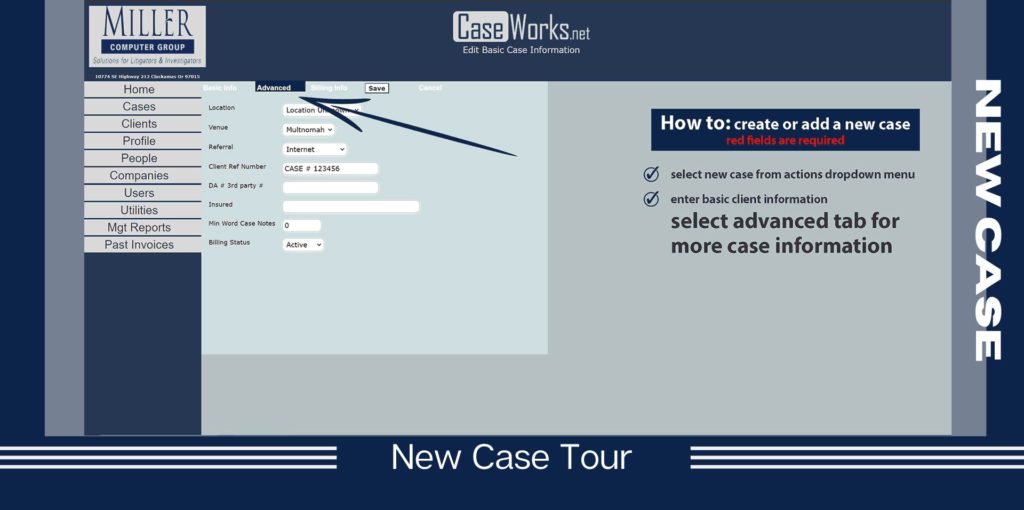
From the new case screen, you will find three tabs: basic info, advanced, billing info. The basic info tab this is where you will put client information. The client field can search for existing clients in caseworks if this is a new client enter their information here. from the basic info tab you could also insert case open, close and incident dates. Next you find a field titled engagement purpose here is where you could enter more detailed info about your case. next you will find a status dropdown menu Is your case active? Is your case pending? If you have more than one investigator working in your PI firm, you could assign people to this case. At the bottom you will find a dropdown menu for case type here you could select the type of case you are working on. You can customize CaseWorks to have your case types and investigators saved and pre-loaded to these dropdown menus. To learn more about customizing caseworks settings and utilities check out this guide for more information
The next tab in your new case screen is advanced. From the advanced tab you could insert more case information, like location and venue information. Hopefully you are tracking where you are getting your cases and if so you could insert your referral source from a dropdown menu. All of these dropdown menus can be customized and preloaded with your information.
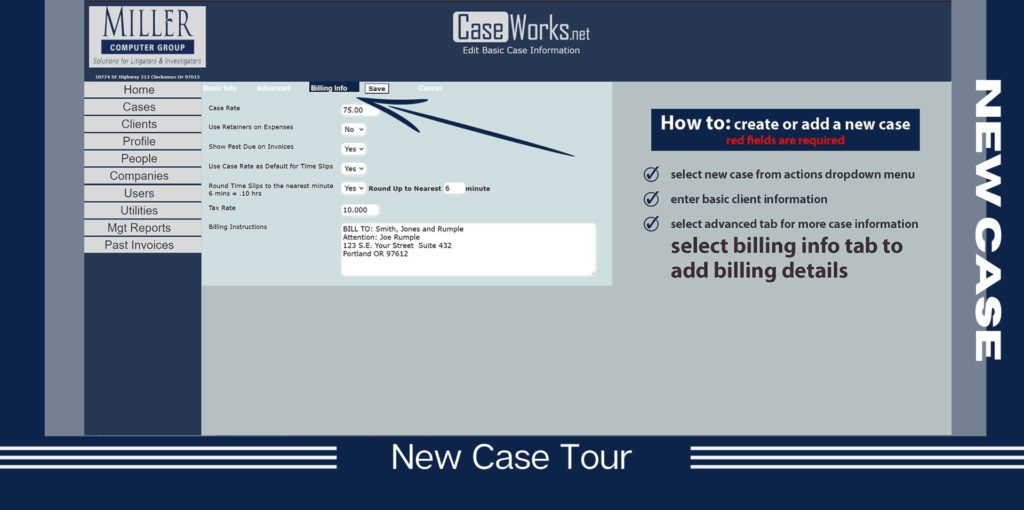
The last tab in the case information screen is your billing info, Here you could insert your case rate pick whether or not retainers can pay for expenses you can also select if you would like to see past invoices you could also input information like your tax rate if necessary. at the bottom you will find a text box for billing instructions Where you can input unique billing instructions this billing info will automatically show up on your invoicing.
And finally, the last step is to hit save or cancel. after you save this new case it will show up in your case dropdown menu as well as your cases page. Everything you enter here can be updated later if needed
Case management made Easy
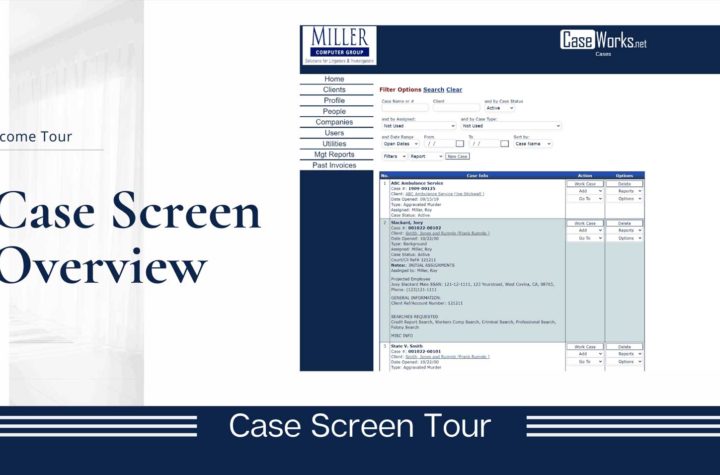
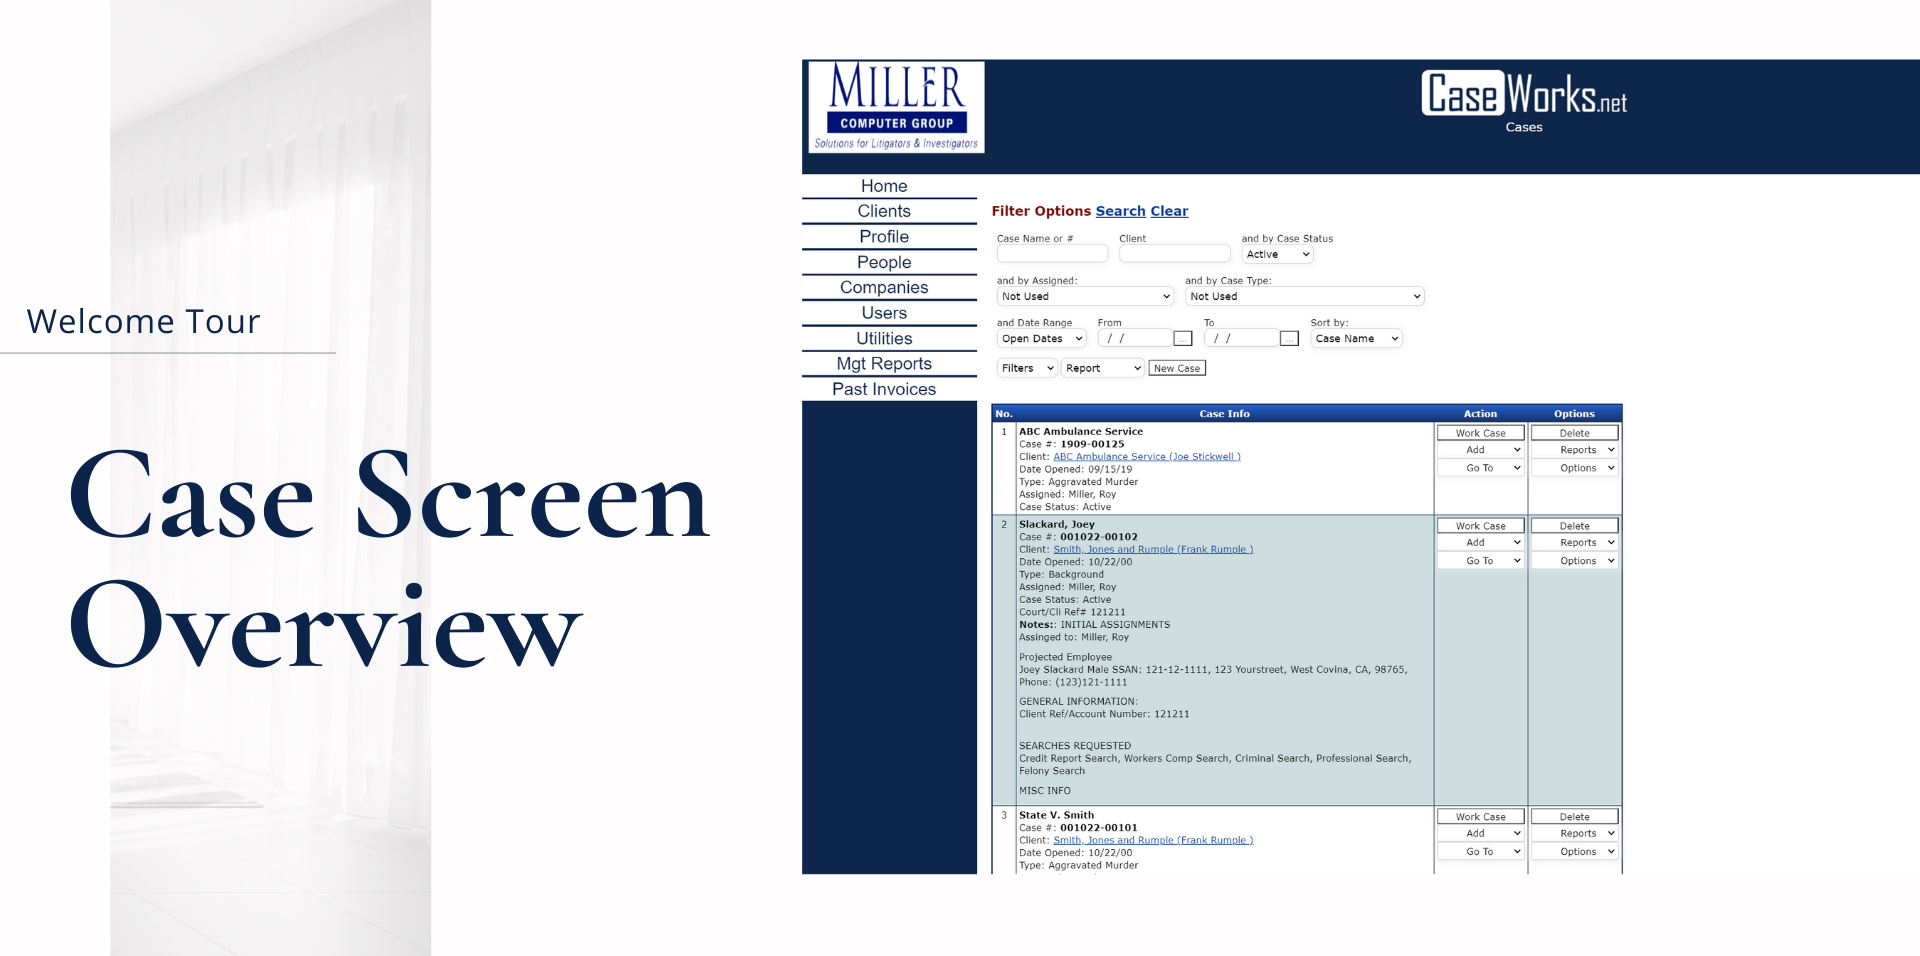
Your Case Screen is the home for your selected case. Think of your Case Screen as a centralized location for everything relating to the case. The Case Screen shows you the case info while showing you all actions and options with your case. You can add a timeslip, manage the case budget, leads …